Version Control 101
In this double feature, Mike walked us through how to get set up using Git, then Peter showed us Github Co-pilot, an AI based code completion tool which runs in your editor. This was a group coding session with input from other members of the community.
Version Control 101.
Git, GitHub and GitHub Co-Pilot tutorial evening
Community coding event. This Wednesday 7th June to The Common, Cleveland Ave.
Come along at 6:30 if you already have Git installed, or 6pm if you don’t and would like some help getting set up.
![]()
In this tutorial we’ll get set up using Git in the terminal then talk about how to fix things when they go wrong.
We’ll start by going through some of the most common Git commands in the terminal, then we’ll move on to using GitHub and Co-Pilot later in the evening.
If you are totally new to Git and you don’t have Git set up on your computer, then come along at 6:00 instead of 6:30 to get set up.
Section 1: Welcome!
A few quick questions: - 30s intro about yourself - What are you hoping to get out of this evening? - Who has used Git before? - What’s your level of familiarity using the terminal?
What is version control?
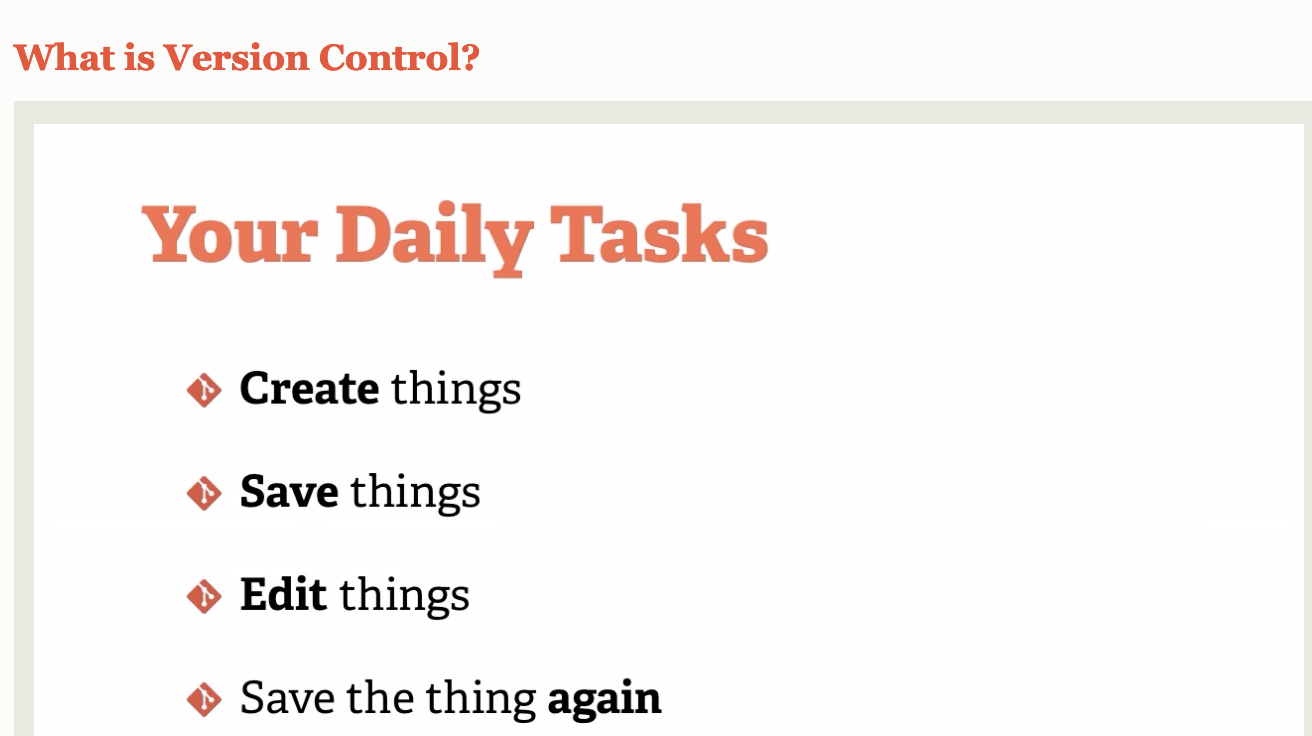
During a project, you’re likely to encounter the above tasks. - Maintaining multiple versions and revisions of files gets really messy when done by hand. - Moreover, when multiple people work on the same document, saving their independent changes to the same file can be difficult. - In a complex project with multiple files, things could get really cumbersome.
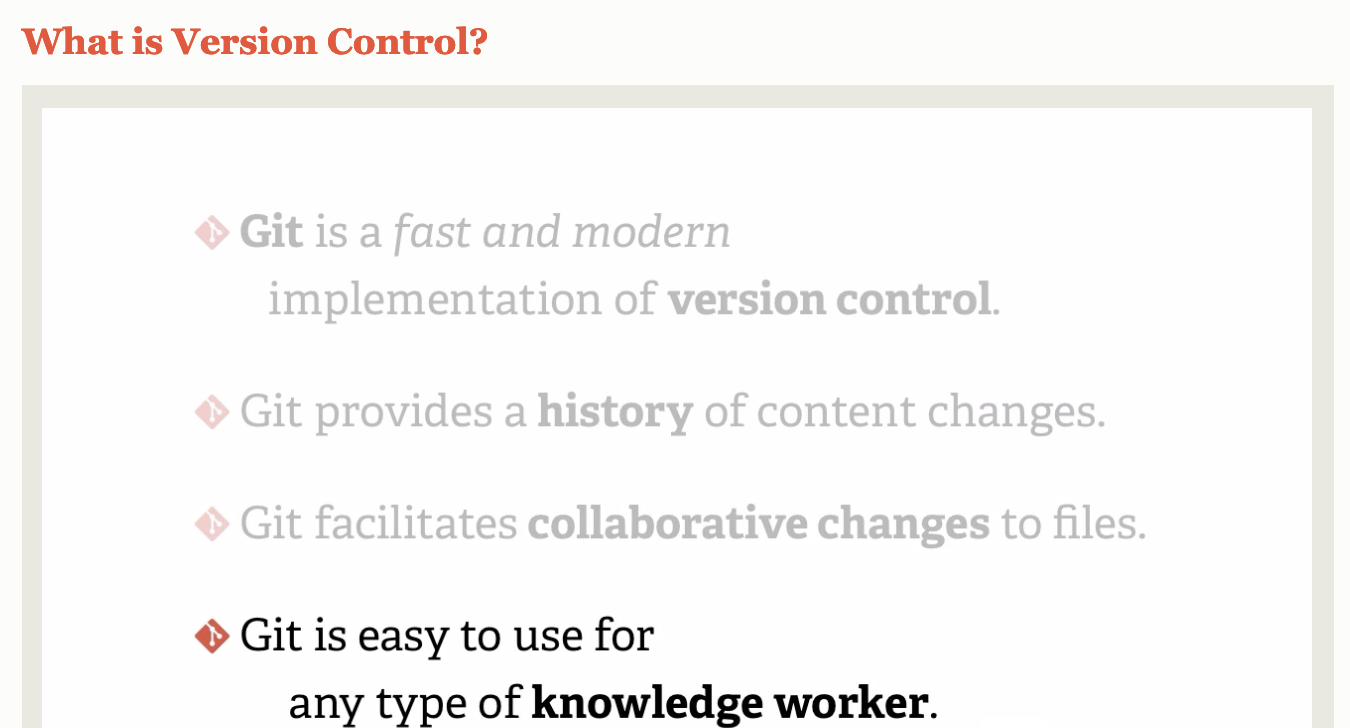
Git is version control software which handles these issues by keeping track of the changes from one version to the next. Past versions of the project are always maintained - never deleted or overwritten, but they are hidden from the user. Instead of overwriting or permanently deleting, git keeps track of the changes from one commit to the next, so recovery of past states is always possible.
Git allows multiple users to edit the same document, and save their changes remotely. Different edits are handled in a neat way by automatically merging changes together where possible.
If it’s not possible to merge these changes automatically, this is called a merge conflict and the software prompts a user to resolve the conflict.
1. Getting Git set up on your machine
Get online
username:
password:
install git
Linux:
head to terminal and enter sudo dnf install git-all
Mac OS:
open Terminal and enter $ git --version then follow prompts to install.
If you don’t have XCode tools installed, you might need to install homebrew, then once that’s setup type brew install git
Windows:
download and install from https://git-scm.com/download/win
Having trouble?
Poke around here https://git-scm.com/book/en/v2/Getting-Started-Installing-Git
Google or check stack overflow
Ask for help if someone is free!
2. configure Git on your machine
git config --global user.name "Mona Lisa"
3. Initialize a git repository
In this example we’ll create a packing list for a couple - mike and elly - who are going on a trip. The project will consist of a couple of text files which are modified by different people then merged together.
Once we’ve all got git running on our computer, we can move on on to the next Choose a location on your computer for the project folder to reside, then type
git init myproject
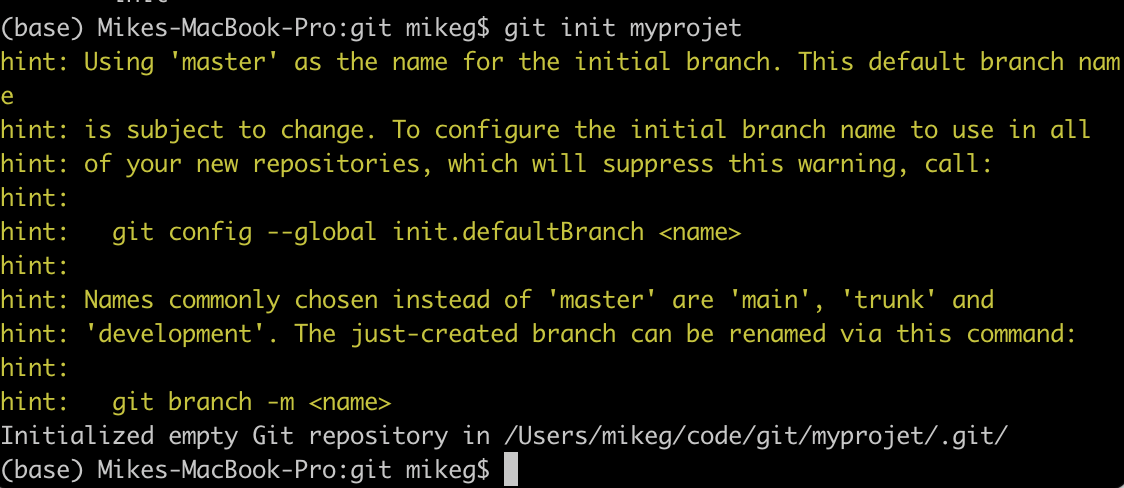
This will create a folder called myproject, within which any changes will be tracked by git. You can confirm the existance of this by typing ls into the terminal.

Once you’ve initialized a git project, there are a few useful commands to learn:
cd myproject will change into the directory named ‘myproject’. You should do this if you haven’t already.
touch README.txt will add a readme file to the current directory. You can also just save a .txt file using notepad or another text editor.
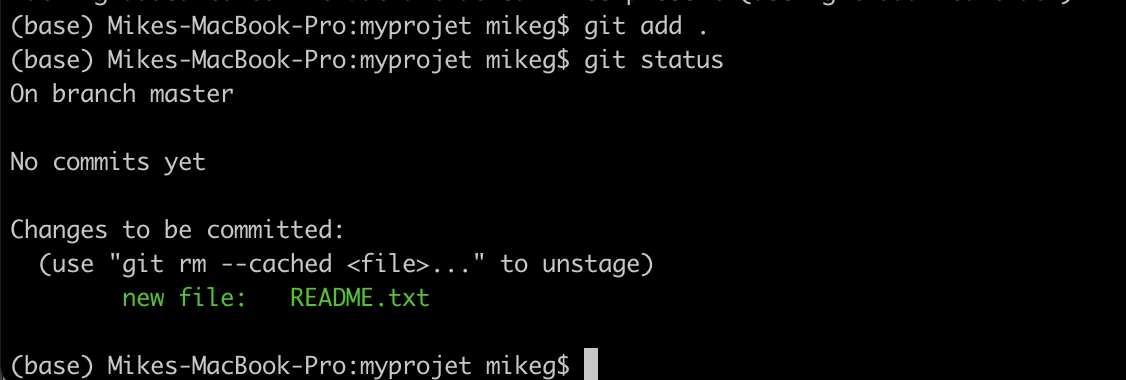
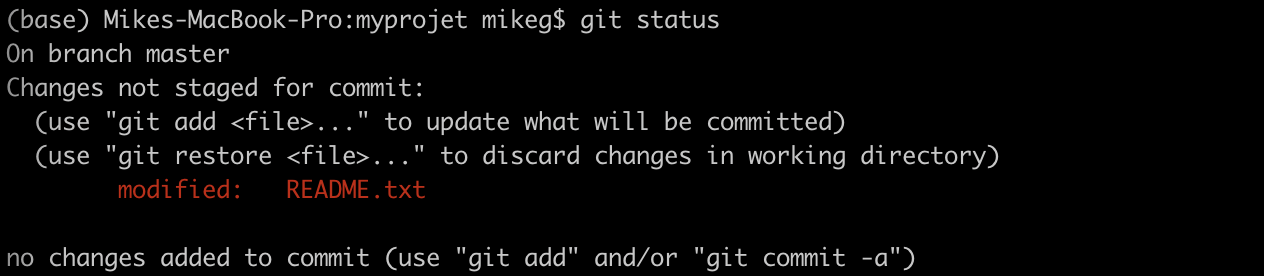
git status will show you which files are present, what’s been changed since you last worked on the project, and which changes will be in the next commit
git add . adds new and modified files to the staging area, where they are ready to commit. Try running git status again to see the changes.
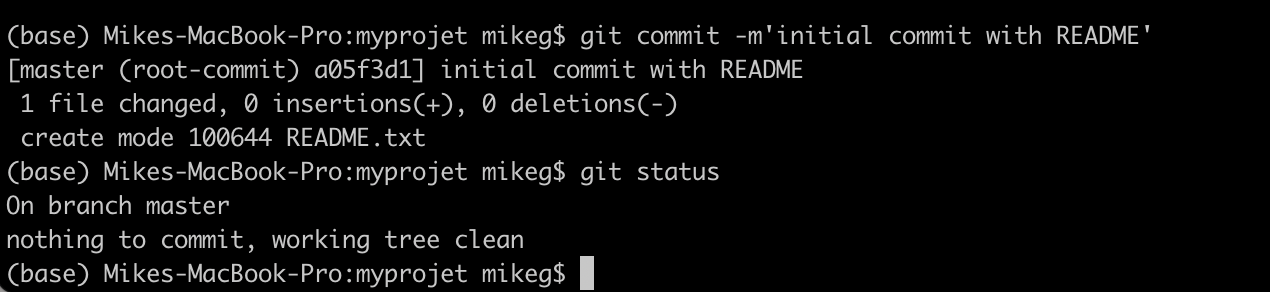
git commit -m'initial commit' saves (commits) the changes which were added to the staging area.
4. Edit the contents of the git repo
You can use any text editor.
If you have a preferred one then use that.
Otherwise install VS Code from https://code.visualstudio.com/
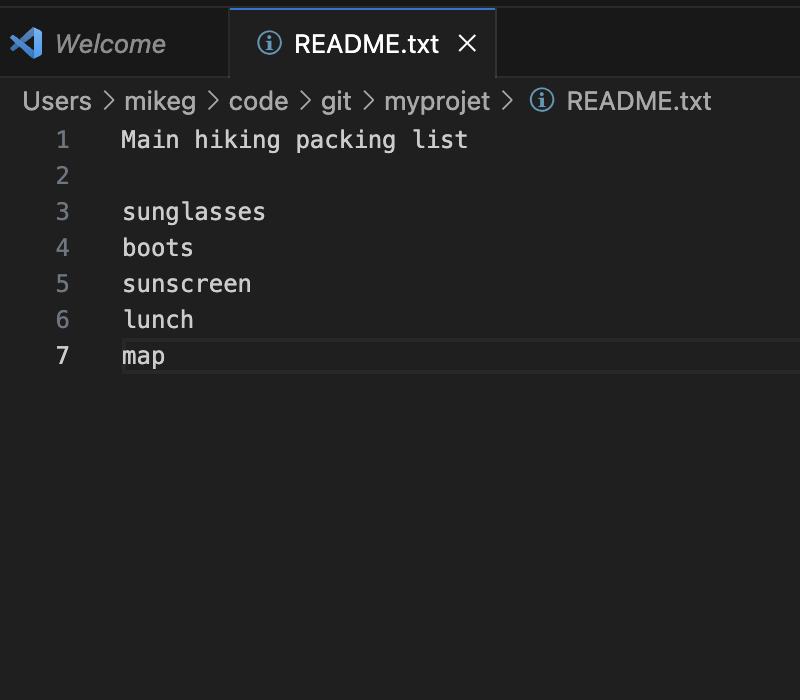
I edited the contents of the readme file to include contents for a packing list.
The new changes are not in the staging area on the master branch yet.
Running git add . adds the changes to the staing area on the master branch 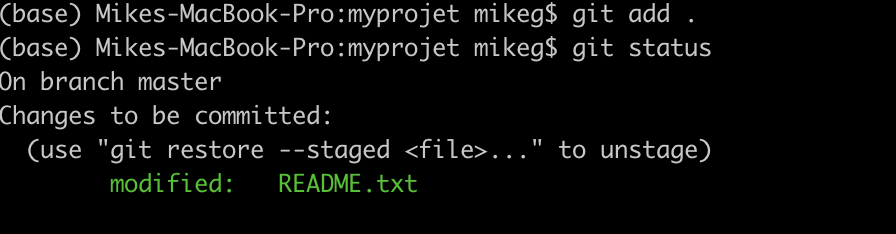
Now we can commit the changes by typing `git commit -m ‘add hiking gear’ 
Making a different branch
We’re currently on the master branch. We could make some changes on a different branch and the original branch will remain unchanged until we merge the brances back together later. Let’s try this! 
git branch ellys-edit
git checkout ellys-edit
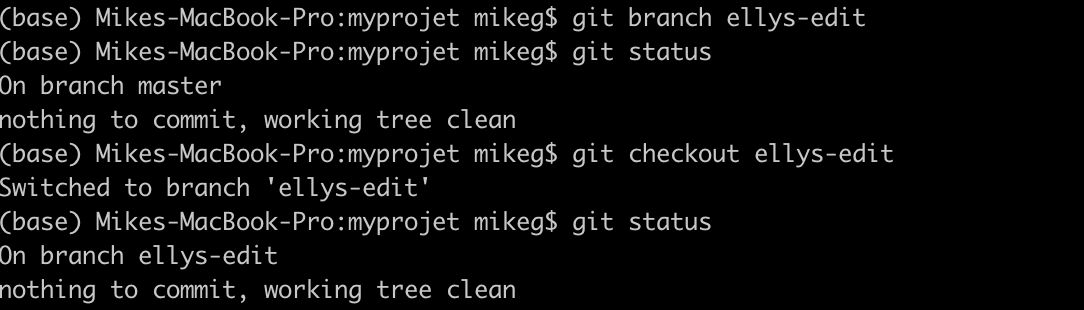
git branch

The green text indicates the branch we’re currently on
Now we’re on the new branch, let’s make some changes.
In this scenario, Elly has been given the task of arranging food for the trip. She creates a new file called food.txt and populates it with important food supplies.
While she’s at it, she realizes that the forecast is for cloud and rain, so she removes sunscreen and sunglasses from the original packing list.
Finally, she renames the README file to gear.txt 
Here’s what the changes look like in the terminal 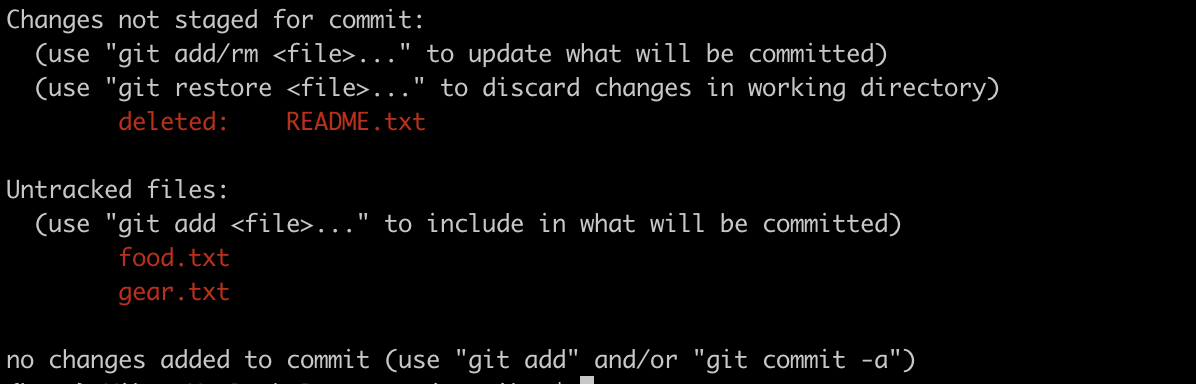
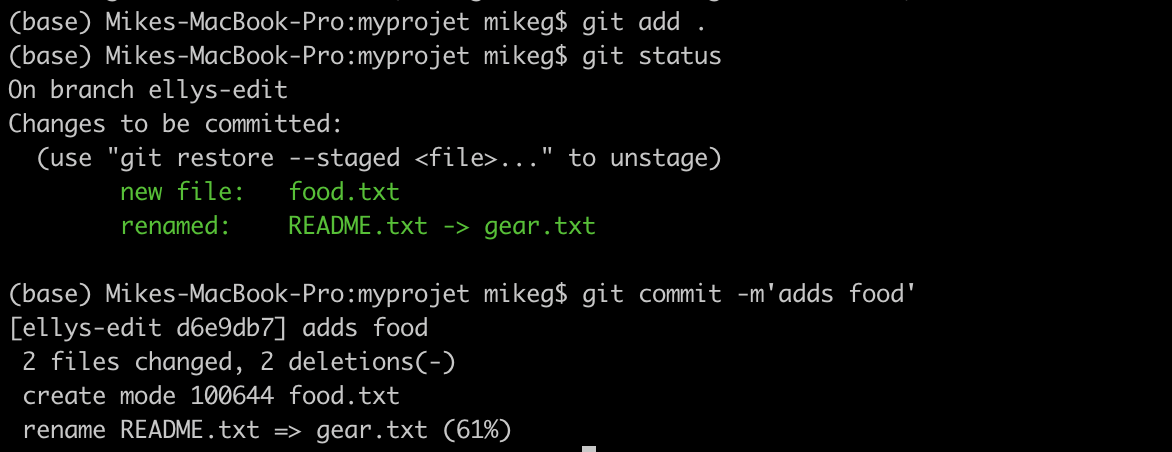
To commit these changes to the master branch, we can run git add . then commit the changes.
Switching between branches
By typing git checkout master and git checkout ellys-branch we can switch between branches. This changes the contents of the directory - have a play with it with the directory open.
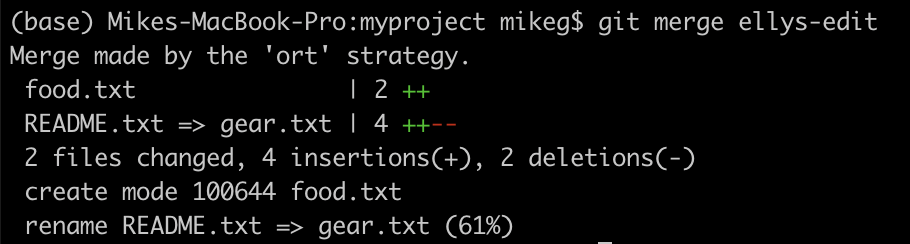
Merging two branches
To merge the changes from another branch, into the one we’re currently on, we can use git merge ellys-edit from the master branch.
5. When things go wrong.
merge conflict
Making edits like this works most of the time, but sometimes we have a conflict, for example when someone edits the same line as code as you - and it isn’t obvious how to merge these edits. In this case we’ll see an error message and we’ll be asked which edit to keep.
Let’s check this out by supposing that I want to save weight by replacing the beer with an empty water bottle, and Elly wants to take it to the next level by ditching the burgers, and adding more beer…
I’ve changed to the respective branches and made the edits to this, and committed the changes on each branch.
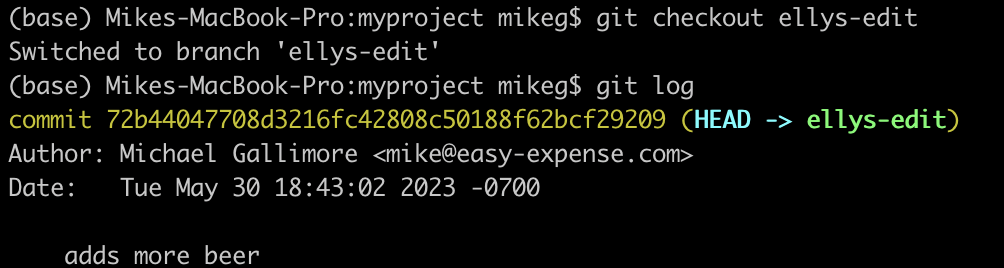
Look at the git log on each branch to see what was done. 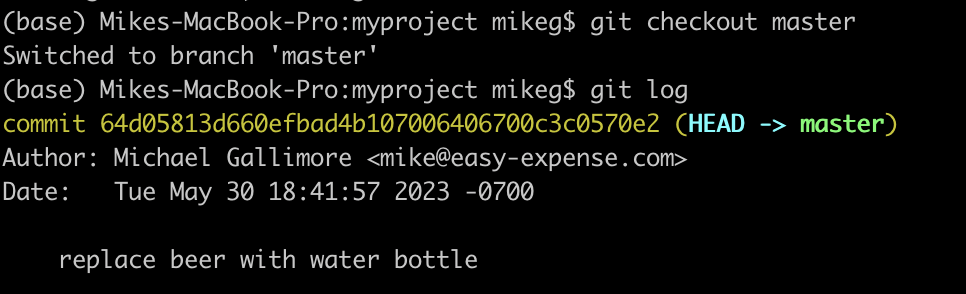
and on ellys-edit:
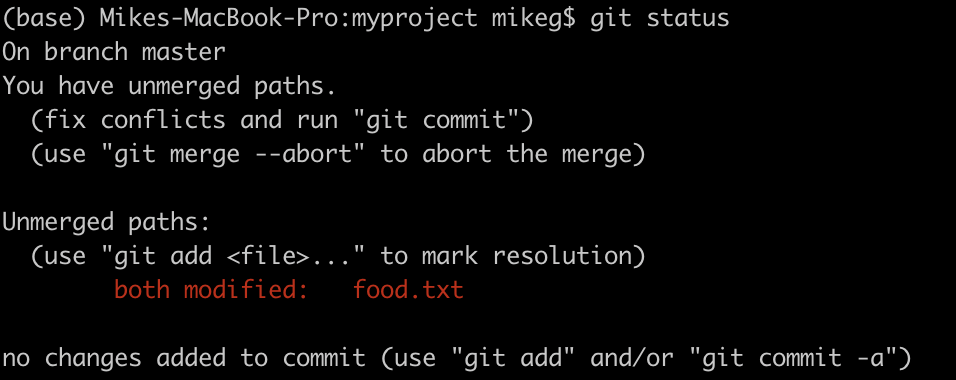
Let’s try a git merge:

Git status gives us more info on the merge conflict - both the branches being merged attempt to modify the same file.
Git diff
git diff shows us the difference between the commits, and where the conflict exists. !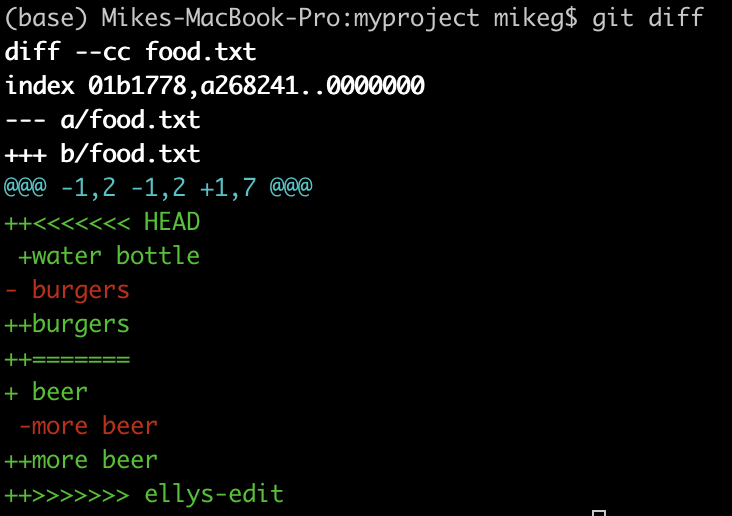
- We have a couple of ways to deal with this - we can abort the merge using
git merge --abortand use a new command such asgit merge --strategy-option ours - Or we can edit the conflicting file partway through the merge. To do this, head to the file in conflict, and remove all the <<<<<<< HEAD, ======= and >>>>>>> ellys-edit sections, then leave the file as you’d like it in the final merged version.
At this point I’ve gone ahead and opened up food.txt in a text editor, and left it how I’d like the final version to be. Let’s see how things look in the terminal.
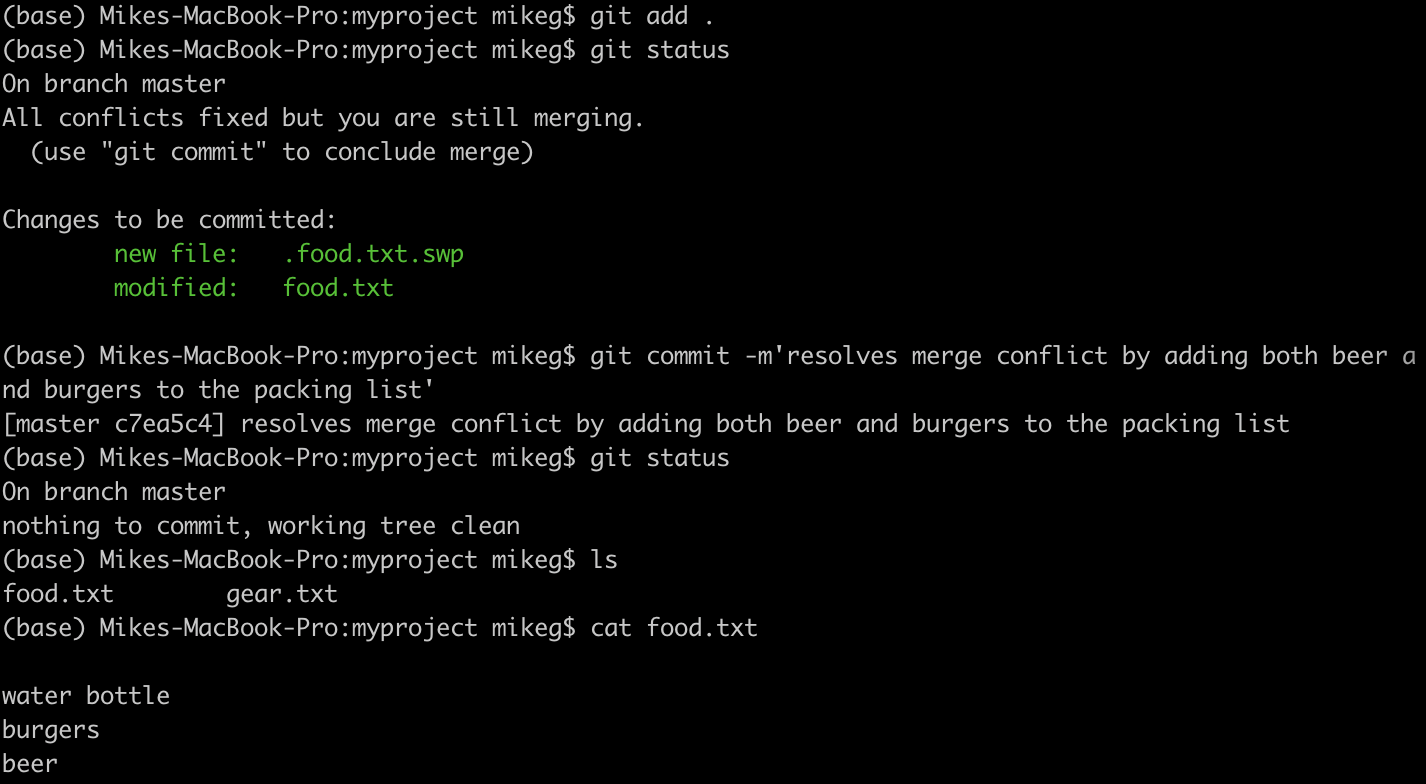
Great! We’ve installed Git, made a project, edited the project on different branches, done a git merge, and learnt to resolve merge conflicts.
What if we made one or more commits, and later realize that the commit broke a section of code? This is where git revert comes to the rescue.
git revert
- makes a new commit which is the inverse operation of an existing commit.
- It allows you to undo the effect of a commit, but still keeps the data which broke your code in case you need to go back.
- this is also useful to avoid undoing history which other people may have branched off of.
- If applying the inverse operation of a commit creates merge conflicts, the revert method will fail.
to use git revert, you can either use
git revert head
to rewind by 1 commit.
or
git revert # where the # is the commit hash.
git log
interactive rebase
Sometimes a git-revert isn’t what you need: I once had an issue when trying to push very large files to GitHub. I was a few commits ahead before I decided to sync my project with the company’s github repo, at which point I found that some files exceeded the remote server’s maximum filesize. I used git revert to selectively remove these large files, adding them to a .gitignore as I went.
interactive rebase allows you to cycle through multiple commits, picking and choosing which parts of which commits are applied:
- To see the hashes of the commits:
git log --all --decorate --oneline
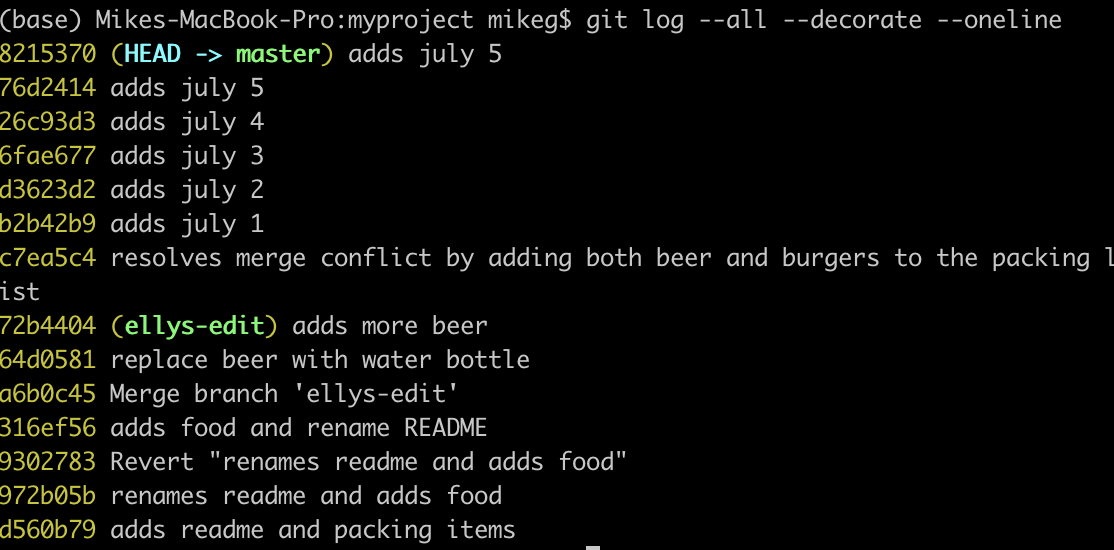
and find the commit hash of the last good commit hash before mistake was made.
then do an interactive rebase from that point on: let’s say we’re wanting to edit the July 4th commit:
git rebase -i 6fae677
a prompt will pop up asking which commits you want to edit and which ones you want to keep unchanged.
Note on vim: If this opens up in vim, you’ll need to be in Insert mode by pressing esc I, then once you finish editing using esc : wq then hit return.
At first all of the commits will say pick in front of them. Change this to edit for the ones you want to modify.
Save the file first then follow the prompts to cycle through the commits one by one.
From here you’ll need to create a series of commits using
git status
then edit, add, remove any files which you need in that commit
Also resolve any merge conflicts as you go through
Once everything is correct for that commit, use
git rebase --continue
to move on to the next commit.
Once you’ve cycled through to the last commit, the git rebase is finished.
6. .gitgnore
If there are files in your project which you don’t want to be tracked by git, just add the filenames or directory names to a folder called .gitignore in the root of the repo.
You can choose to use a template for yor project type: https://github.com/github/gitignore
Or create your own from scratch: https://docs.github.com/en/get-started/getting-started-with-git/ignoring-files
7. GitHub
GitHub is a remote server implementation of Git. It provides powerful collaboration features and provides a place to host projects.
![]()
cloning and pull requests
Using Git and GitHub we can easily copy (pull) an enitre code repository to our local machine, make an edit, then create a request for our edit to be merged back into the original codebase. This is called a Pull Request.
SSH Keys
One of the things you’ll encounter getting your computer talking to GitHub, is setting up an SSH key. This can be quite fiddly, and we don’t have time to go into it in this tutorial - but if you encounter this then here’s a guide on setting up an SSH key on the GitHub website: https://docs.github.com/en/authentication/connecting-to-github-with-ssh/adding-a-new-ssh-key-to-your-github-account
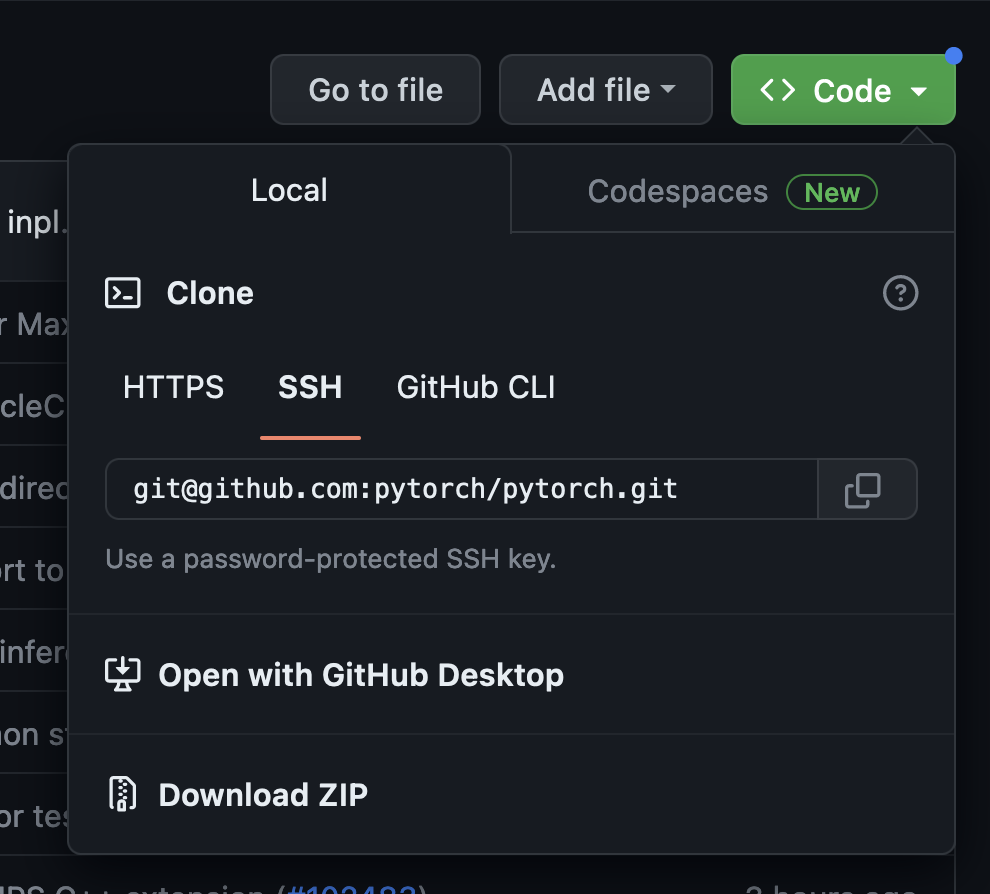
Cloning an existing project on GitHub
Once you’ve got SSH keys setup and working, this is as easy as typing
git clone followed by the address of the repo on GitHub
Any changes you make will be local changes, until you commit and push the changes. Pushing the changes will attempt to push back to the repository which was cloned - so if you want to keep your own version of the project separate, you’ll want to fork the repository before cloning it.
Using VS Code with Git and GitHub
Microsoft VS Code is excellently integrated with Git and GitHub. Setup is quick and easy. All of the commands we’ve seen here are implemented via a GUI in VS Code.
8. Conclusion
We’ve looked at the terminal interface for Git, and learned concepts on how to
- Initialise a repo using git init
- git add . to add files to the staging area ready to be added to the next commit
- git commit -m'message' to commit the changes to the current branch
- git branch branchname to create a new branch in the project
- git checkout branch to see details on which branch we’re on, and which files are staged for the next commit.
- git merge branch to merge another branch with the current one.
- git merge --strategy-option ours to resolve merge conflicts - or by editing the file directly and removing the decorators.
- git revert head to overwrite the effects of the previous commit with a new ‘anti-commit’
- git log --all --decorate --oneline to show a compact log of all the commits and their hashes
- git rebase -i hash to systematically go through and re-commit each commit from a past point.
then had a quick look over GitHub and how we can use it to collaborate with others, edit opensource codebases, and create a backup of our work.